We examine how to use Twitch Studio and find your game capture source.
Over the last several years Twitch has done an excellent job identifying new ways to get more users on their popular streaming platform. And for good reason. Just last month it was announced that streaming entertainment had outpaced cable for the first time. In terms of live-streaming, the growth is just as staggering. Twitch already boasts tens of billions of hours of streaming video, and by 2024 it is estimated that there will be over 50 million Twitch users.
So how can we all get in on that traffic and monetization potential? First, we’ll need a way to stream on Twitch.
If you’re like us and would prefer avoiding thousands of dollars of investment just to try out the platform, there are several ways to find out if competitive gaming or live-streaming on Twitch is for you; Amazon Luna, Mobile, or retro games that have very low processing requirements on a typical PC or Mac running Stream Labs, OBS, or a much lighter weight broadcast platform like Twitch Studio Beta.
Table of Contents
What is Twitch Studio?
Twitch Studio is a free streaming software developed by Twitch that is designed to help new streamers get started and make it easier for experienced streamers to manage their streams. It offers a range of features, including built-in alerts, overlays, chat integration, and more, which are designed to help streamers create high-quality broadcasts with ease. Additionally, the software provides step-by-step guidance during the setup process, making it easy for novice streamers to get up and running quickly.
Twitch Studio for Mac and PC
First and foremost, Twitch Studio for Mac performed incredibly well on our 11-inch throwback, which is almost a decade old (MacBook Air, Early 2015). Our Obama-era Mac managed to hold it together for over three hours of toggling and streaming, though it did run awfully hot in the last hour. Our PC test performed similarly.
In any case, we’re convinced Twitch Studio is lightweight enough to run on most laptops; however, as mentioned previously, you’ll be working with some pretty low-fi games if you want to stream for several hours.
However, whether you’re on an older laptop or Mac or have just powered up a monster gaming PC and are ready to show the world those skills with the magic of Twitch Studio, you’re going to need to figure out how to capture your game first.
Installing Twitch Studio
Getting started with Twitch Studio is easy. From your Twitch Channel, click on the profile icon and select Video Producer. On the left side of the screen locate Streamer Tools. The first available tool is Twitch Studio. Select Download.
Whether you’re on a PC or Mac, setup is quick and easy. Once you’ve installed the app you’ll need to link it to your Twitch account. The entire process should take just a few minutes.
Next you’ll be asked to confirm that Twitch can use your preferred microphone and camera. Once you’ve give it permission, Twitch Studio intuitively sets up your workstation. All that is needed now is to add a game capture.
How to use Twitch Studio game capture function
While it doesn’t have the same type of learning curve as Stream Labs or OBS, Twitch Studio still requires some configuration. Searches on Google like, “Twitch studio not capturing game” and “game capture screen is black” mostly have nothing to do with the capture function not working.
Twitch Studio allows you to build “scenes,” which are configurations for things like gameplay, commercial breaks, intros and outros, and chatting. These scenes allow you to switch between active entertainment and preset content with the click of a button. To set our game capture up, we’ll need to select the Gameplay scene.
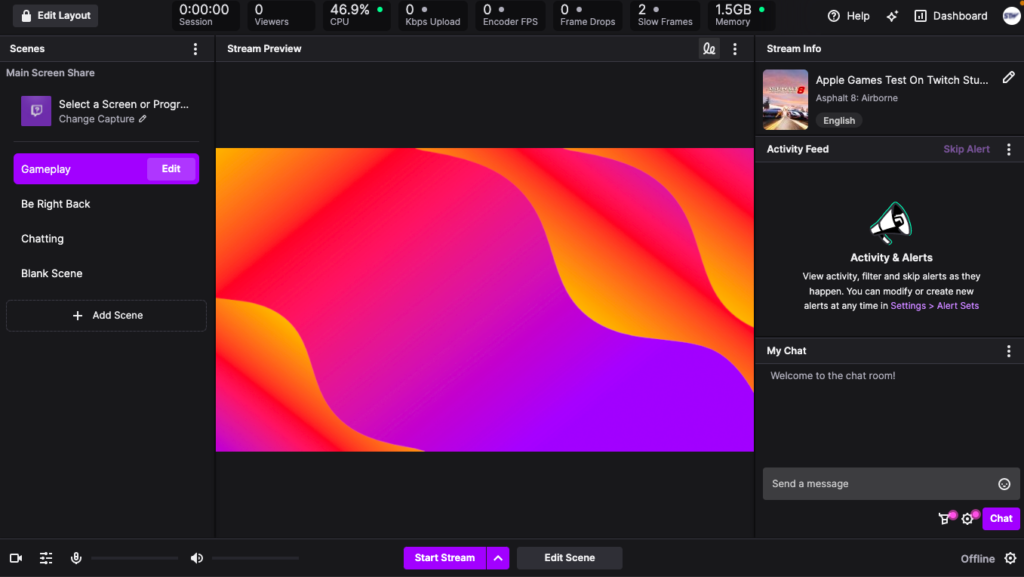
Once you’ve selected the Gameplay scene, you’ll need to adjust the layers. Twitch Studio comes with several layers already in place, including a background image, an onscreen chat component, a webcam box, and a game capture component.
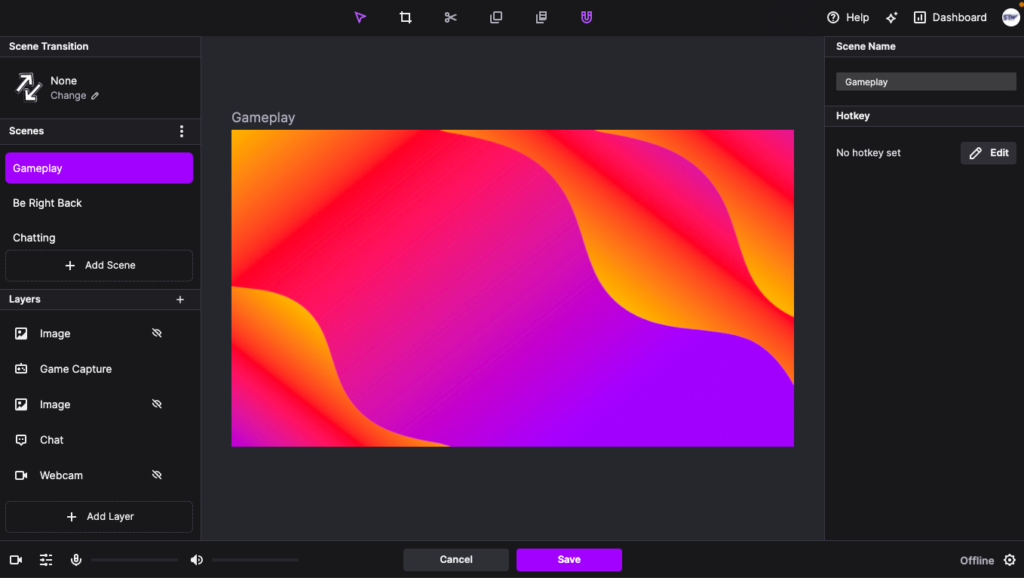
Select the Game Capture layer.
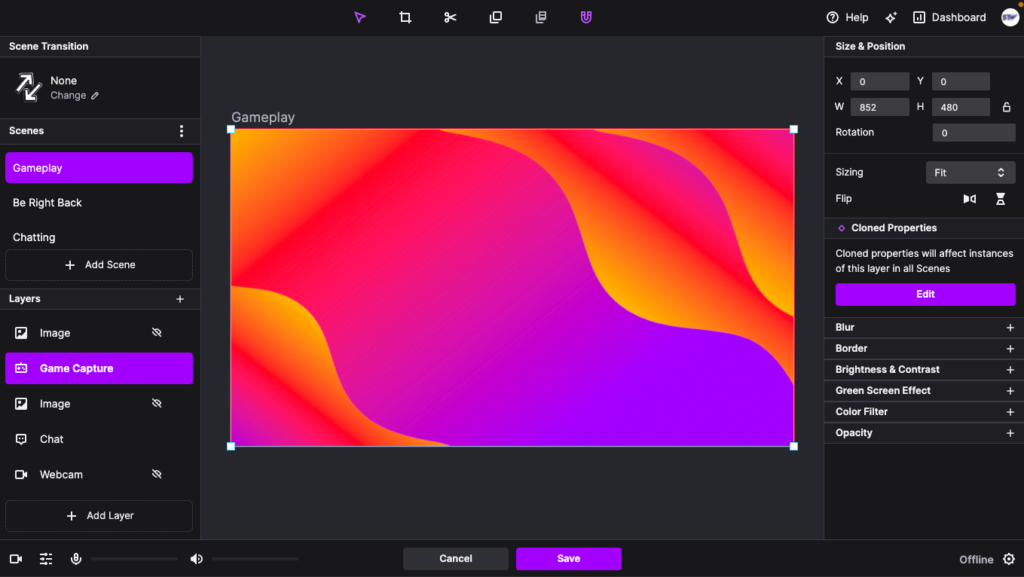
Notice a prompt box on the right titled Cloned Properties, press Edit.
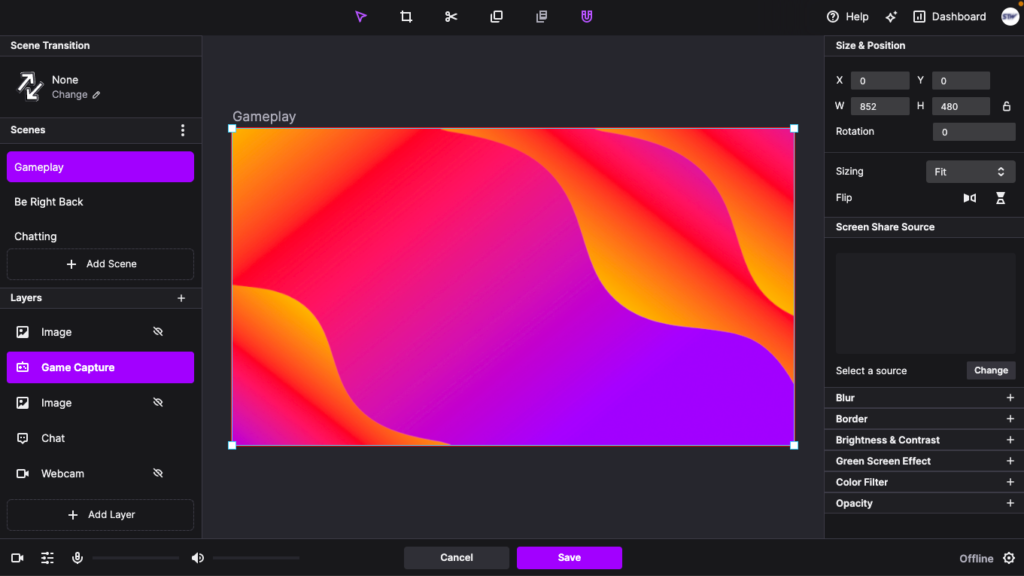
You’ll see a Screen Share Source dialogue box appear. Below it, you’re prompted to choose a source, select Change. This should open a Screen Share source selection prompt.
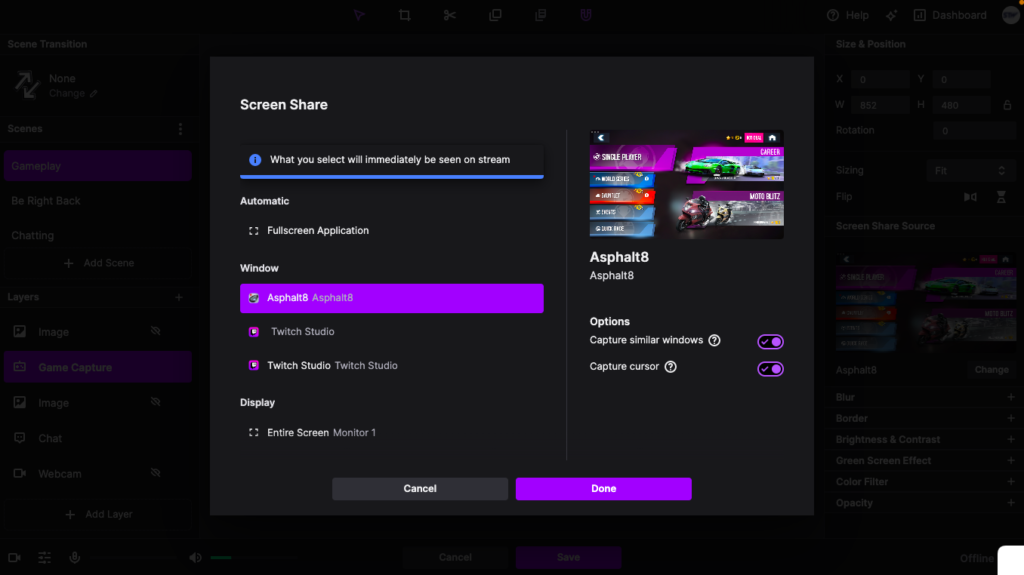
In this case, we’re playing Asphalt 8 on iOS and the game comes right up under the Window section. However, Twitch Studio should pick up any gaming application you’re running. We also tested this on a PC with Fortnite via Epic’s Unreal Engine. If the game does not appear, you may need to close both the game and Twitch Studio and restart them. In our tests, we found that this was never a problem if we opened Twitch Studio first and then our game.
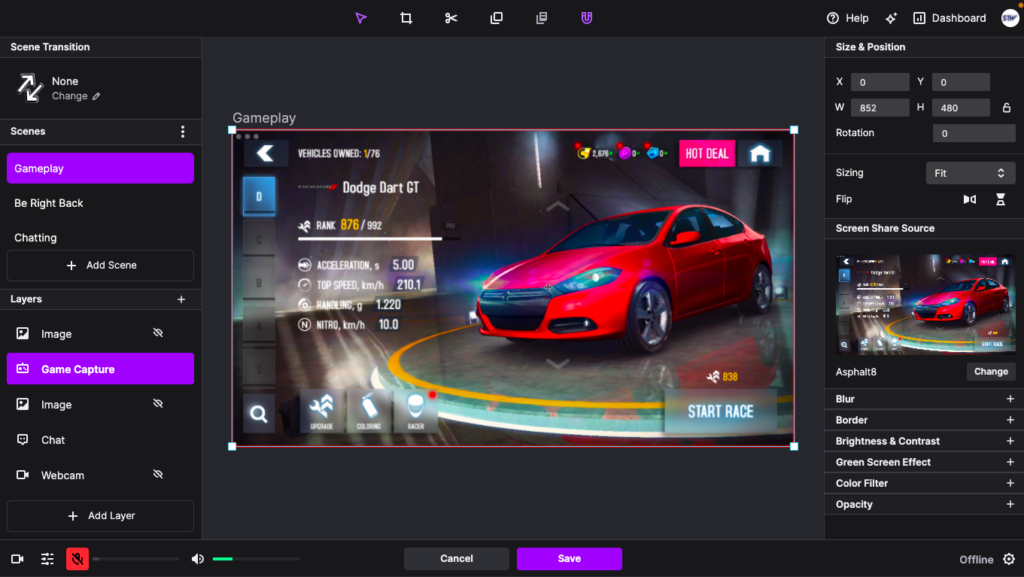
That’s it!
Make sure you press the Save button and return to your stream screen. Tip: Before you start your stream, don’t forget to update your Stream Info in the top right corner of your stream screen by pressing the pencil icon and updating the basic info; Title, Description, Language, etc. These settings will help Twitch make your stream more discoverable to the appropriate audience and improve your chanel’s SEO.
Final words
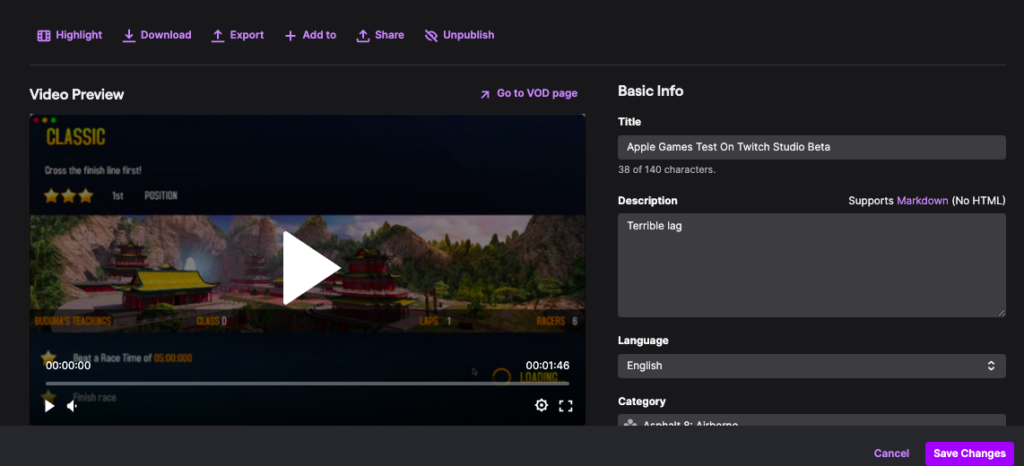
As we mentioned, using a computer that isn’t optimized for gaming comes with limits. As you can see in the video below, our attempt to run Asphalt 8 on Twitch didn’t result in the best viewer experience.
However, we had no problem running games like Pool and SimCity (examples available on our Twitch page).
At the end of the day, if you want to stream games like Call of Duty or Fortnite, you’re going to need something capable of running broadcast software appropriately. This means game capture issues may not always be the result of software, your computer may not be able to keep up. Running Twitch Studio and a game simultaneously can tax your CPU to the point that it simply cannot process requests.
If restarting Twitch Studio and your game doesn’t resolve the issue, ensure your layers are stacked properly (game capture should be the highest layer). Otherwise, checkout Twitch’s support page for Twitch Studio.
Happy streaming!
