File: Twitch closed captions extension.
In the last decade, Twitch has exploded in growth and popularity. In 2022, it is estimated that Twitch had over 140 million users from around the world. But with so much growth and an increasingly diverse and multicultural audience, how do you know whether you’re effectively communicating with everyone? Here’s why you should use a Twitch closed captions extension to improve your channel’s look and performance.
Table of Contents
Why should you use a Twitch closed captions extension?
First, using a Twitch closed captions extension ensures your content is viewable by a wider audience. Remember, your audience on Twitch is global. Hence, utilizing a Twitch closed captions extension can help ensure viewers who are not fluent in English or speak English as a second language have a better chance of understanding all the nuances other viewers pick up on during your stream.
Second, adding a Twitch closed captions extension may be required, whether you’re aware of it or not. In 2018, the federal government issued a new rule for online content which requires all federal technology to be accessible against something called the Web Content Accessibility Guidelines (WCAG). These guidelines include requirements for closed captions. Channels that operate on FCC-regulated airwaves were required to make the move to closed captions years ago, but WCAG dictates that all online content include closed captions.
Specifically, the requirement states:
“Captions are provided for all live audio content in synchronized media.”
Now, does this mean that your Twitch channel is in legal danger right now? Not necessarily. The WCAG standards have yet to be required by Title III entities (private businesses), though this is expected to come in 2024 when the Feds adopt a modified version of the standards for private individuals online. However, just because it is not a requirement to have a Twitch closed captions extension by default doesn’t mean you couldn’t be compelled to add them if a viewer emailed you with what is called an “ADA reasonable accommodation” request. But why wait for that call?
And this isn’t something creators will be able to pawn off on Twitch. As a content creator, you could be held liable if you refused to activate closed captions on your site upon request from a viewer. For this reason, it’s important to manage your channel closely and understand the needs of individuals who come to watch you play.
Third, and this may be the most obvious; why would you want to keep viewers who need closed captions off your stream anyway? Viewers who are hard of hearing or deaf want to enjoy your channel as much as anyone else, and adding them isn’t difficult; so why skimp on this important piece of producing professional and accessible content?
Which Twitch closed captions extension is best?
While there isn’t yet a consensus on which Twitch closed captions extension is best, Twitch has provided a few options at no cost for Twitch streamers. Today, we’ll review installing the “Closed Captions for Streams” extension.
Note: There are other options available. For example, Verbit’s closed captioning extension comes with 3Play Media’s high quality customer support and more accurate voice to text recognition software. However, you can use one of the extensions Twitch provides for now; at the end of the day, all services are just algorithms and cannot promise “perfect” captions regardless.
To add a Twitch closed captions extension
Click on your Twitch profile picture to access your Creator Dashboard.
Next, select Extensions.
Under the Discovery section, you should see two options, Closed Captions for Streams and Stream Closed Captioner. Add Closed Captions for Streams.

Next you’ll need to configure the extension. Click on the link for Closed Captions for Streams. With the extension open, press Configure.
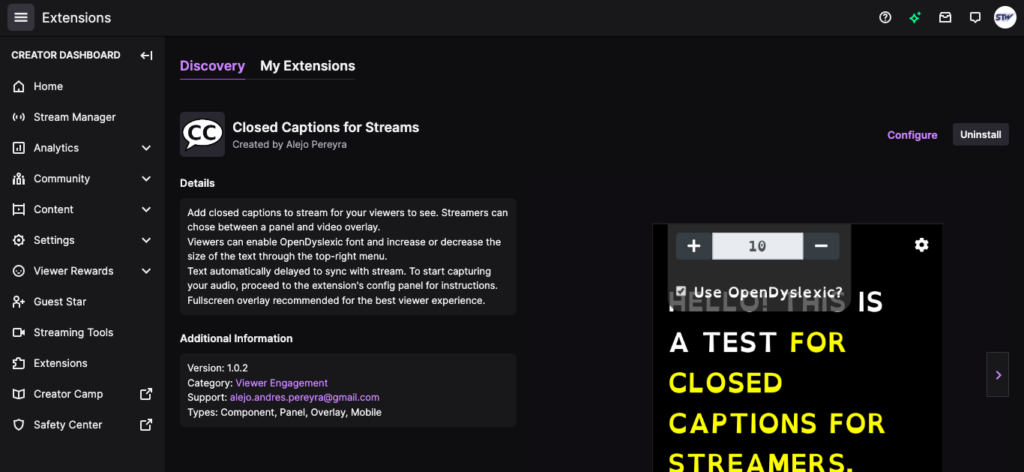
You’ll then be prompted to activate the extension and assign it a place on your stream frame as a component, overlay, or panel item. We’ve selected Component 1.
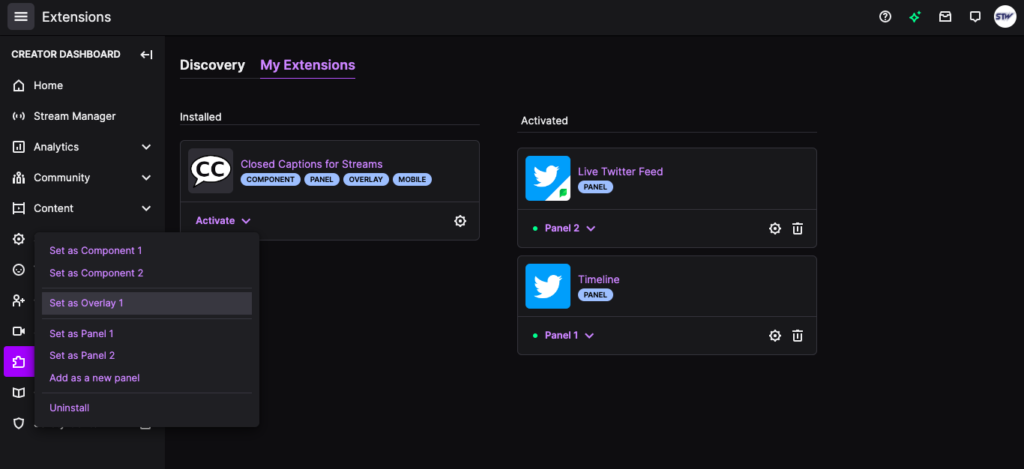
Note: In the image below, we selected Overlay 1. However, we ran into trouble using the captioning tool with an overlay. Instead, select Component 1 (or 2, 3, 4, etc.) to get started, you can always change this later.
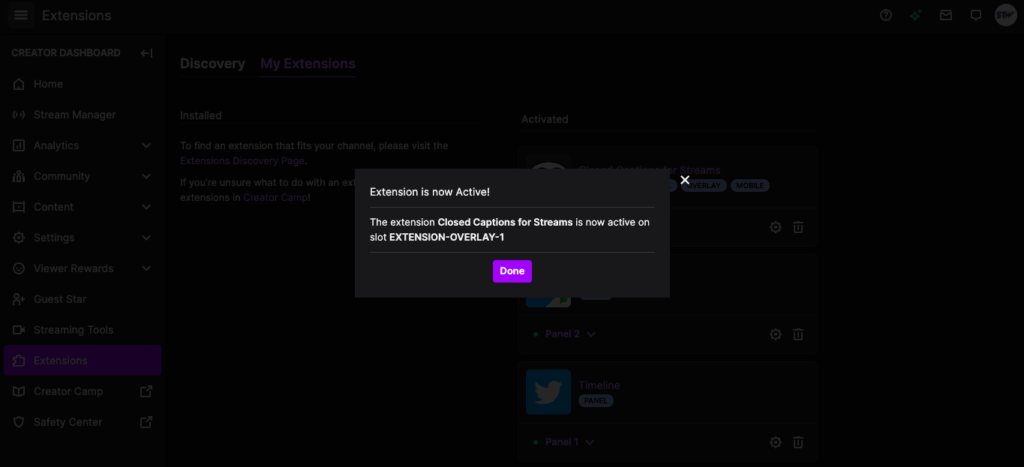
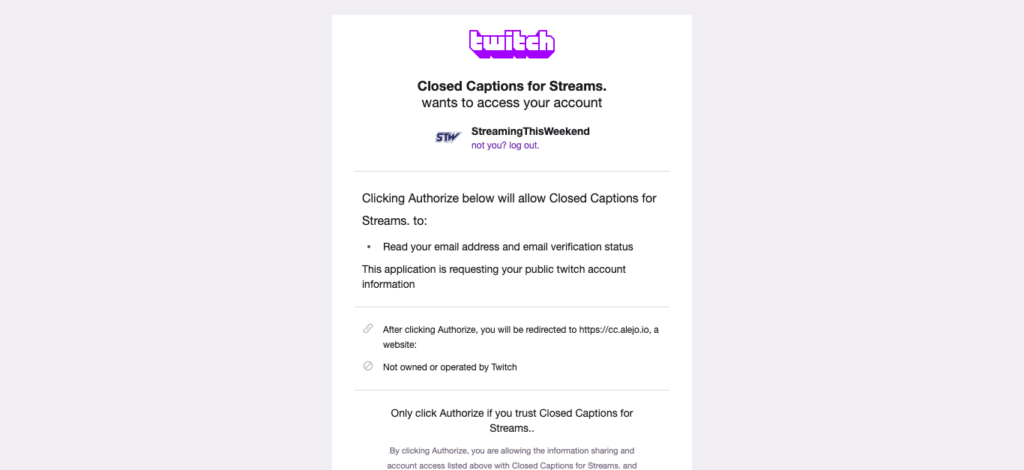
Next, you’ll need to give the captioning software permission to access your account.
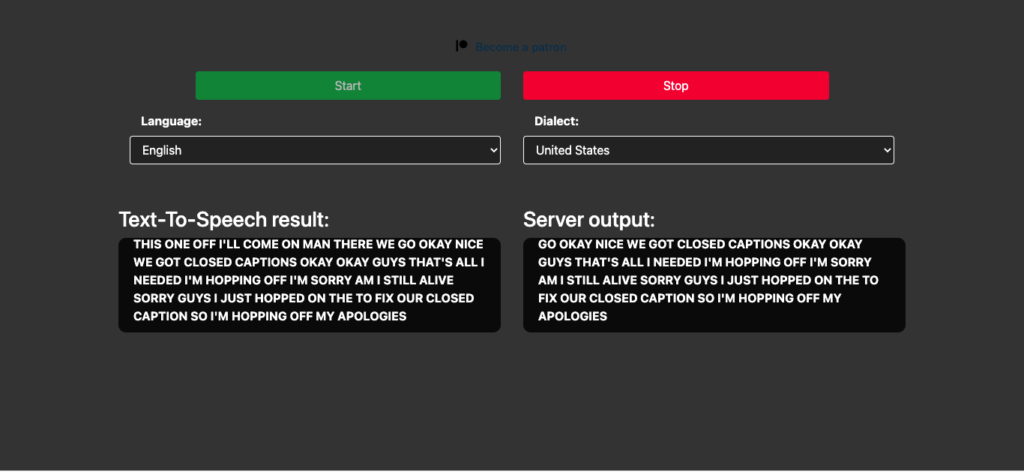
Finally, you’ll need to select a language and start recording your audio for the captioning tool. This audio will be used to create your captions and print them to your Twitch channel landing page.
Note: It’s true, you’ll have to run the caption feed each time, but once you’ve set up the extension all that is required is to click on the link mentioned above and start captioning before you go live. You’ll need to keep that browser window open during your stream, but for the cost of zero bucks a month, you can add a critical accessibility feature to your Twitch channel.
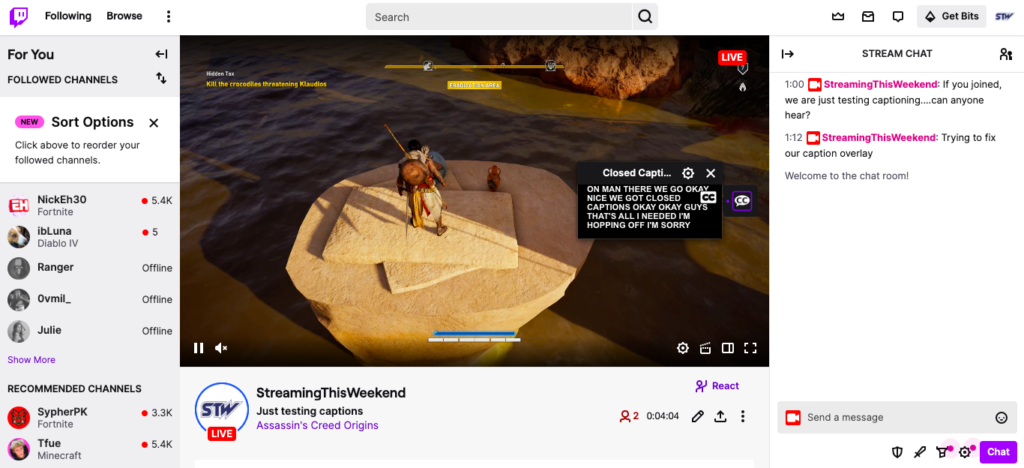
Go back to your Twitch channel to ensure the closed captioning feed is being picked up by Twitch. If you were successful, you should see a “CC” option on your screen. Click it to open up the caption feed on your stream.
Final words
Honestly, based on our tests, Twitch has some work to do regarding closed captions. However, by making the effort, you’ve at least given viewers who use captions the best chance of enjoying your stream to the maximum extent feasible.
Given that closed captions are likely to become a requirement for all streamers by 2025 (at least, based on how far along the federal government appears to be in their rule-making process), there is really no downside for improving the accessibility of your stream. Not only will you give more viewers the opportunity to enjoy your content, but you’ll also be among the limited few who are complying with existing web content guidelines, something Google gives SEO points for as well.
Happy Streaming!
